
Popcorn Ceiling Removal Guide
Popcorn ceiling is a sprayed or trowelled texture that creates a rough, stippled surface overhead. It was widely used because it helped disguise minor imperfections and reduced the need for a perfectly smooth finish. Many GTA homeowners now remove it for a cleaner appearance, easier maintenance, and more even light across the ceiling. Removal is not simply a matter of scraping until the texture is gone. Age, previous paint, moisture damage, drywall condition, and possible asbestos all affect the method. This guide explains the safety check, the professional process, common mistakes, realistic timing, and the difference between a scraped ceiling and a genuinely smooth, paint-ready one.
What Is a Popcorn Ceiling (and Why Remove It)?
Popcorn, acoustic, or stippled ceiling texture was a common ceiling finish for many years. The irregular finish reduced visible shadows from taped joints and minor surface variation, allowing builders to finish ceilings efficiently. It also created a distinct visual style that many owners now associate with older interiors.
Homeowners may remove it because dust and cobwebs collect on the texture, spot repairs are difficult to match, strong side light exaggerates unevenness, or a smoother ceiling better suits the rest of a renovation. Removal can improve visual continuity, but it does not automatically correct stains, cracks, waves, or poorly finished drywall underneath. Those conditions become the next stage of the work.
Before You Start — Check for Asbestos
Older ceiling texture may contain asbestos. Scraping is specifically concerning because it breaks the material apart and can make fibres airborne. Do not assume that age alone proves a ceiling is safe, and do not take an unprotected sample or begin a test scrape.
Canada's federal Prohibition of Asbestos and Products Containing Asbestos Regulations came into force in 2018, but those rules do not prove that material already installed in a home is asbestos-free. Product history, later renovations, and the installation date may be uncertain. Professional laboratory testing is recommended before any DIY scraping when asbestos could be present. Until the result is known, leave the texture undisturbed.
This safety decision sits before ordinary removal planning. Review our ceiling repair and removal services for standard non-asbestos ceiling work. Suspected or confirmed asbestos requires the appropriate testing and abatement path first.
How Testing Works
A qualified testing provider collects or guides the collection of a small representative sample using controlled procedures, then a laboratory analyses the material. Results commonly take days rather than minutes. Do not disturb, sand, drill, scrape, or wet the ceiling while waiting. A visual inspection cannot reliably confirm or rule out asbestos.
If Asbestos Is Found
Confirmed asbestos texture is not a standard scraping job and should not become a DIY experiment. The project requires a certified asbestos-abatement contractor who can determine whether controlled removal, enclosure, or another compliant approach is appropriate. Standard painting or drywall work can be planned only after the hazardous-material scope has been addressed and the area is cleared for the next trade.
DIY vs. Hiring a Professional
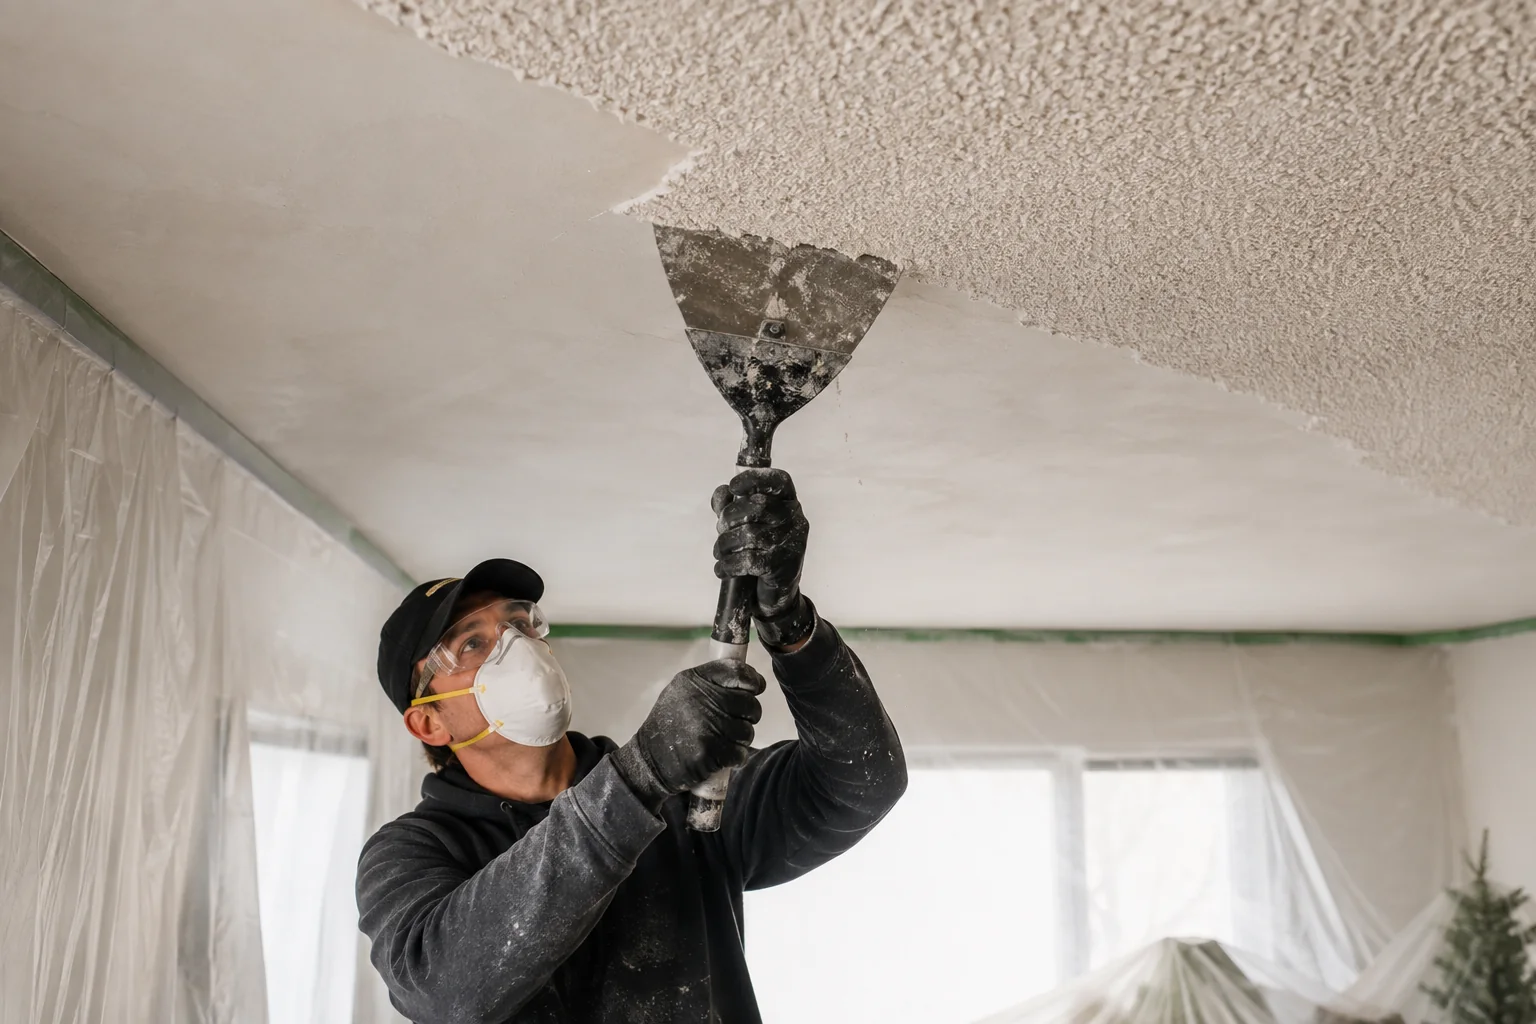
DIY removal can reduce labour cost when the ceiling has tested safe, the texture is unpainted and releases easily, the room is small, and the homeowner is prepared for overhead work and extensive containment. Even in that favourable case, the process is wet, messy, physically demanding, and sensitive to technique. Over-wetting can damage drywall paper; dry scraping creates more dust; and aggressive tools can gouge the board.
Painted texture is usually more difficult because water cannot penetrate it easily. Previous patches, water damage, multiple paint layers, high ceilings, and occupied furnished rooms also increase the challenge. The most common DIY disappointment is not the scraping itself but the ceiling revealed afterward: visible joints, torn paper, ridges, dents, and texture shadows still require finishing.
A professional approach plans containment, controls debris, handles the scraping sequence, repairs the substrate, and produces a smooth paint-ready surface. Review Gold Painter's full range of painting and ceiling services when removal needs to connect with patching, priming, and painting.
Access is part of the decision. Bedrooms with standard ceilings are easier to isolate than an open stairwell, vaulted room, or main floor connected to several spaces. Working overhead for long periods also increases fatigue, which makes gouging and uneven pressure more likely. If you DIY, stop when control declines; rushing the last section can create more finishing work than the initial removal saved.
What Does Popcorn Ceiling Removal Cost?
There is no responsible single price for every ceiling. Cost changes with total area, ceiling height, room access, the amount of furniture that must be protected, whether the texture has been painted, and the condition of the drywall beneath it. Cracks, stains, loose tape, damaged board, or heavy waves add repair and finishing work.
Asbestos status changes the category of contractor and work entirely. Standard removal pricing must not be used to estimate certified abatement. For non-asbestos texture, the choice between leaving the ceiling ready for paint and having it fully primed and painted also changes scope.
Online figures are useful only when they define what is included. Ask whether containment, debris handling, scraping, repairs, skim coating, sanding, primer, and paint are part of the number. You can get a rough estimate with our repair calculator for related ceiling damage, but an on-site visit is the reliable way to price a complete removal.
Room-by-room scheduling can change the practical cost as well. Combining connected rooms may make protection and finishing more efficient, while working around occupied areas can require repeated setup. Ask whether fixtures, ceiling medallions, crown moulding, and open transitions are included. A clear estimate should distinguish standard texture removal from repair discovered underneath and from any hazardous-material work that is outside the contractor's scope.
The Popcorn Ceiling Removal Process, Step by Step
After safety has been confirmed, successful removal follows a controlled sequence. Each stage protects the next; rushing preparation or finishing usually creates more work later.
1. Prep the Room
Power and fixture handling must be planned safely. Containment keeps wet debris and sanding dust from spreading into adjacent spaces. The ceiling is inspected for painted texture, stains, cracks, loose areas, and previous repairs so the sequence can be adjusted before scraping begins.
2. Mist and Scrape
When the tested-safe texture is suitable for wet removal, small sections are lightly misted and given time to soften. The goal is controlled dampening, not saturating the drywall. A broad scraper is held at a shallow angle to lift the texture while minimizing gouges. Work proceeds section by section so the surface does not dry out or become excessively wet.
Painted texture may resist water and require a different approach. Forcing the scraper can tear drywall paper and create deep repairs. Loose tape, exposed fasteners, and damaged joints discovered during removal are marked for correction rather than hidden with the next coat.
3. Skim-Coat to Smooth the Surface
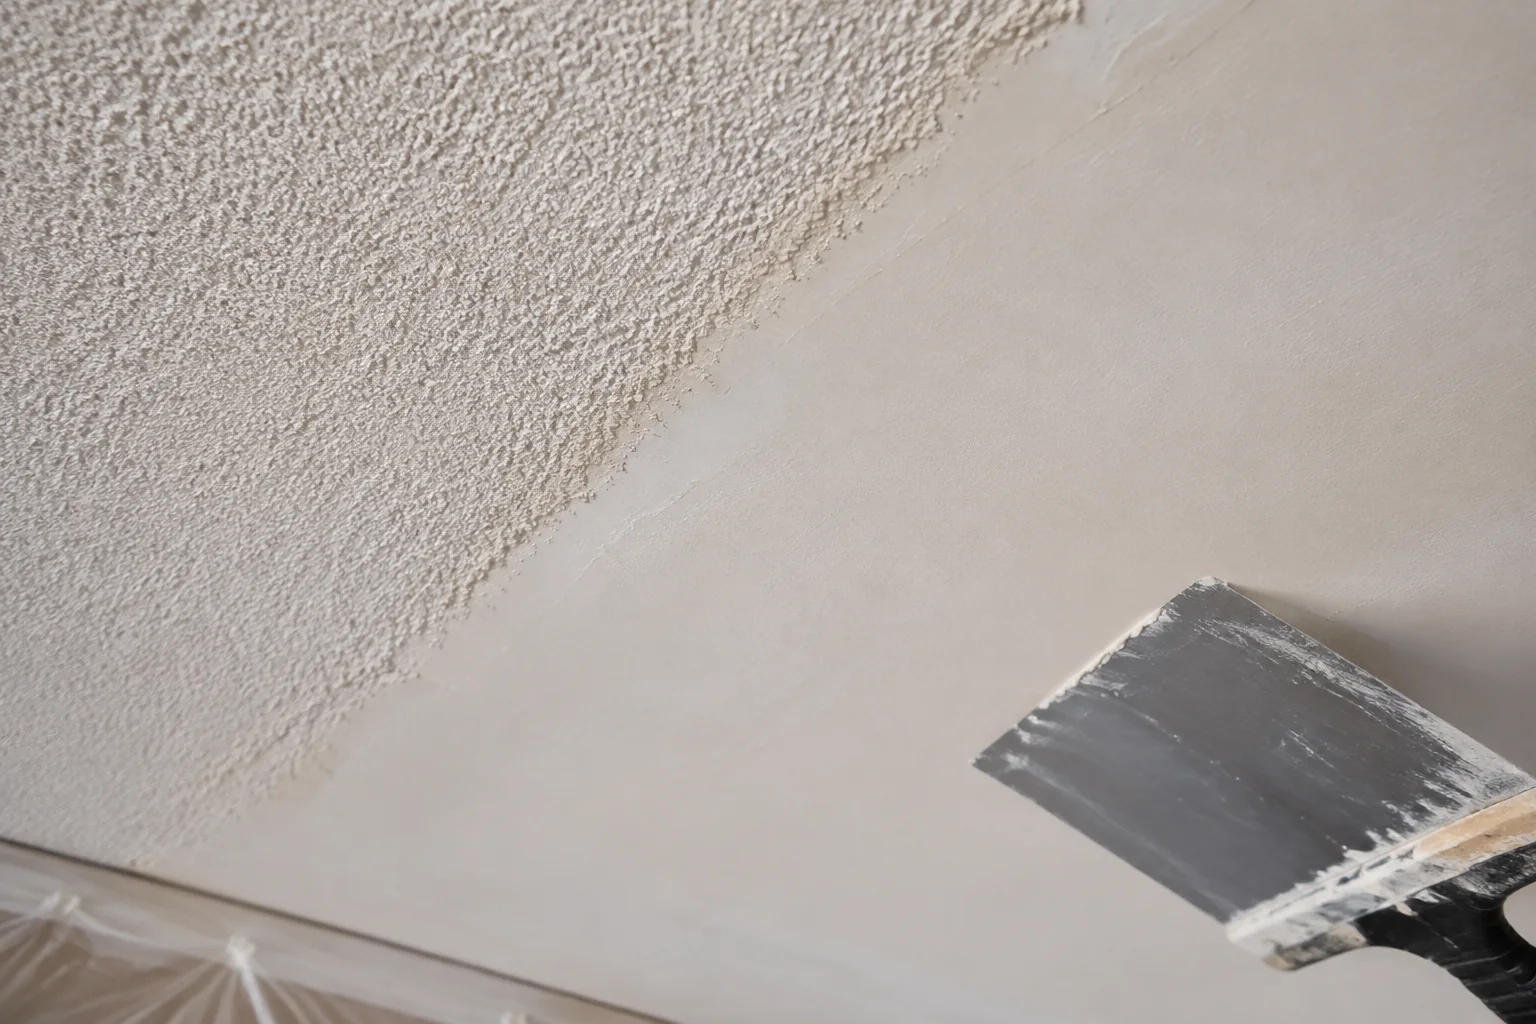
After scraping, a ceiling is rarely perfectly smooth. Texture hides joint edges, fastener depressions, shallow waves, and small tool marks that become obvious once the surface is flat. A thin skim coat of joint compound creates a more uniform plane. Depending on condition, localized repair or broader coating may be needed.
The compound is applied in controlled passes with edges feathered into the surrounding ceiling. Deep defects are not filled with one heavy layer; they are built and dried appropriately to reduce cracking and shrinkage. Once dry, the surface is sanded with strong side light used to reveal ridges and hollows. Dust containment remains important through this stage.
Skim coating is the difference between “the popcorn is gone” and “the ceiling is ready to look smooth under paint.” You can see examples of finished ceiling projects represented in Gold Painter's capability gallery while documented client photography is being added.
4. Sand, Prime, and Paint
Final sanding refines the plane and softens compound edges. The ceiling is inspected under raking light, then cleaned so dust does not interfere with primer. Primer seals joint compound and repaired drywall, evens porosity, and creates a consistent base for the finish coat. Skipping it can leave dull or shiny patches where the topcoat absorbs differently.
Ceiling paint is usually applied in a flat or matte finish to reduce glare, with clean cut lines at walls and trim. Adequate drying between primer and coats matters. Ventilation should support drying without driving dust onto the wet surface.
Colour should be confirmed before final coating. A clean white can maximize brightness, while a related warm off-white may connect better with wall colour and trim. Samples still matter overhead because window light travels differently across a ceiling than a wall. The chosen finish should suit the repaired surface and avoid excessive sheen that highlights minor variation.
Common Mistakes to Avoid
- Skipping asbestos testing. Do not disturb uncertain texture based on appearance or age assumptions.
- Over-wetting the ceiling. Saturated drywall paper can swell, tear, or release from the gypsum core.
- Holding the scraper too aggressively. A steep angle and excessive pressure create gouges that need additional filling.
- Assuming scraping creates a finished surface. Most ceilings need repair and some degree of skim coating.
- Skipping primer. Bare compound and drywall absorb finish paint unevenly and can make patches visible.
- Applying uneven skim coats. Ridges and heavy edges become obvious once light travels across the smooth ceiling.
How Long Does It Take?
Popcorn ceiling removal is commonly a multi-day project because preparation, wet removal, repair, skim coating, sanding, primer, and paint each need their own working and drying time. Room size, ceiling condition, humidity, access, and the number of compound coats affect the schedule. A ceiling that scrapes easily can still require careful finishing afterward. If asbestos testing or abatement is required, that occurs on a separate timeline before standard work begins.
FAQ
Does removal always need a skim coat?
Not every ceiling needs the same amount, but scraping commonly reveals joints, texture shadows, and surface variation. Localized filling may be enough on a well-finished substrate; broader skim coating is often required for a uniformly smooth result. The decision is made after the texture is removed and the ceiling can be inspected.
Can you paint directly over popcorn instead?
Intact, tested-safe texture can sometimes be painted, particularly when the goal is only to refresh colour. Painting does not make it smooth and may make later wet removal more difficult. Rolling can also loosen fragile texture, so condition and previous coatings matter.
How messy is the process?
Scraping creates wet debris, and sanding creates fine dust. Good containment and controlled sectioning keep the project manageable. The amount of preparation should reflect whether the room is empty, furnished, open to adjacent spaces, or difficult to isolate.
Does removal add home value?
A smooth ceiling may make an interior feel cleaner and more current, but value depends on the whole property and buyer priorities. Treat removal as a finish and maintenance decision rather than a guaranteed financial return.
Plan the Ceiling Before You Scrape
Safety testing comes first, followed by a realistic plan for containment, substrate repair, skim coating, and paint. Gold Painter is serving homeowners across Richmond Hill and the GTA for standard painting, drywall, and ceiling scopes. To have the ceiling condition reviewed and the non-asbestos work scoped, request a free estimate.
Share the approximate room dimensions, ceiling height, whether the texture appears painted, any known leak history, and whether rooms are furnished. That information helps prepare for the visit, but the ceiling still needs to be seen in person. Do not create a test patch before the safety question has been resolved.
Plan for the complete ceiling system, not scraping alone.
Before scheduling, decide whether light fixtures, ceiling vents, crown moulding, or adjoining rooms affect access. These details shape protection and sequencing even when the ceiling area seems straightforward. A complete walkthrough helps set realistic expectations for preparation, drying, finishing, and cleanup.
Have a project in mind?
Let's see what your space needs.
Arrange a free on-site visit and we'll talk through your project.